How to Send Form Data directly to your Email

Have you ever created a simple form, probably a contact form on your portfolio website but had to remove it because you didn't know how to collect or handle the user's data😔😔.
Forms are an essential part of every website, they are used to collect information from users. But it gets tricky when there is no backend or database to submit the data to.
Well in this article I'll show you how to send the content of a form on your React application directly to your Gmail or Email. So without further talking let's get to it.
Prerequisites
Basic understanding of React JS as we'd be working with a React application🤩.
A code editor (VS Code recommended).
And a browser of course (Chrome recommended).
Email JS
Email JS is a JavaScript library that allows you to send emails directly from the front-end of an application. The cool thing is that no servers are required, all you need to do is connect it to one of the supported email services, create an email template, and use EmailJS to trigger an email.
In this tutorial, we'll be using Email JS to send the content of our React form directly to our Gmails. (PS Email JS works well with pretty much every front-end technology including plain JS but I'd be using React because that's what my Portfolio is built with😜😜)
Getting started
Now we know about all the technologies and frameworks we'll be using, let's start implementing. First of all, we create a fresh react application
npx create-react-app email-js
And then we install Email JS using this command
npm i emailjs-com
Let's set up an Email JS account before returning to the code. Go to emailjs.com and sign up and create a free account. After successfully signing up you should see a dashboard like the one shown below
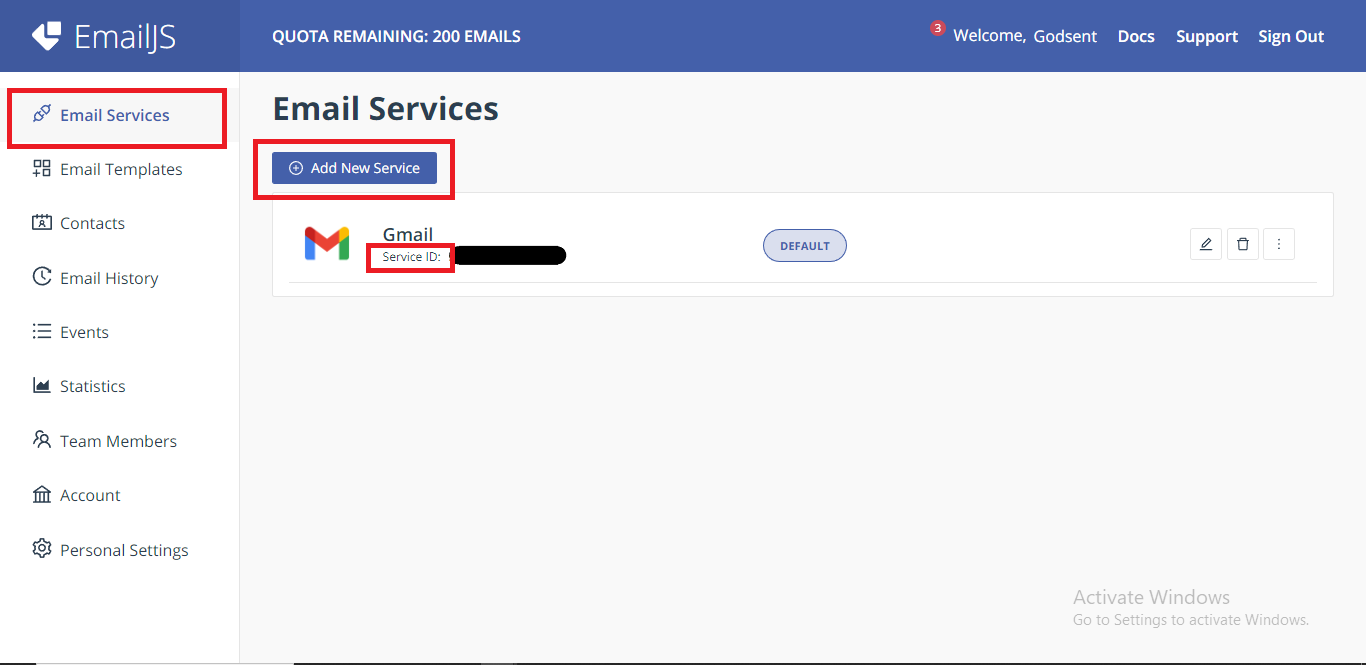
I would show how to create a new service but as you can see in the image above I already have a template created, take note of where the Service ID is located because we would be needing it later. Click on the "Add new service" button on your dashboard and you'd see a menu like the one shown below
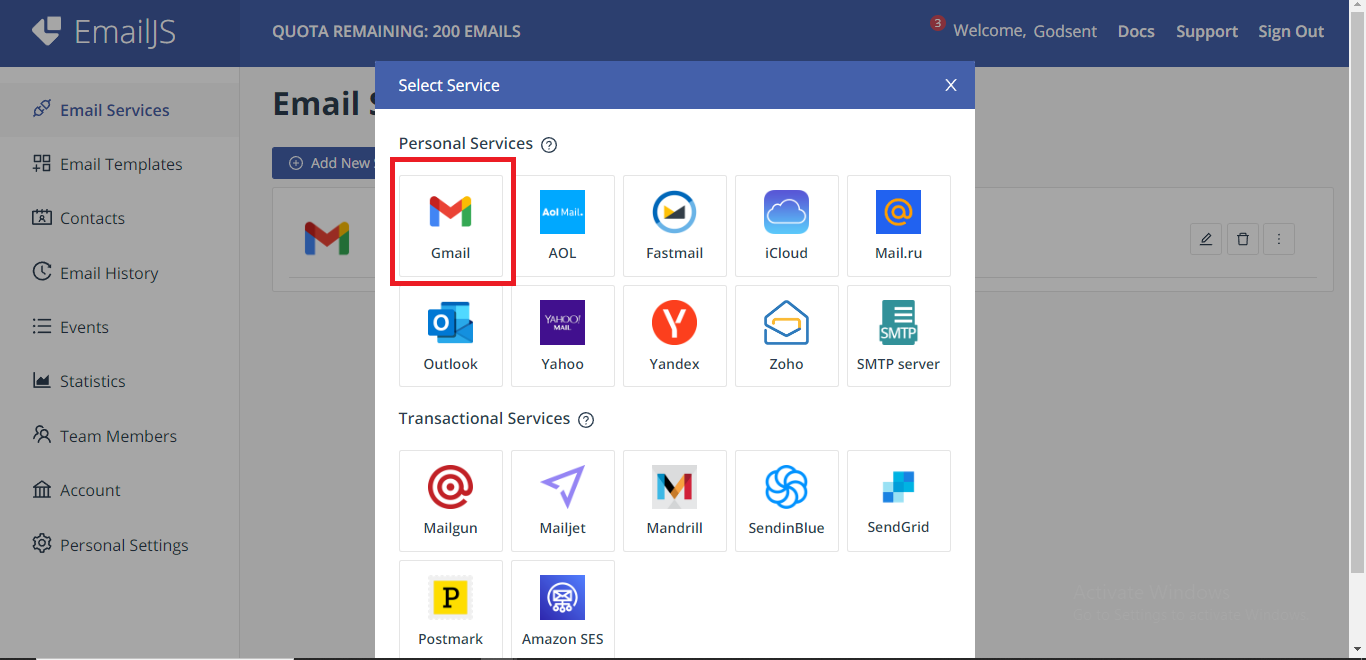
Click on Gmail and complete the process of creating the service and linking the service to the gmail account you want to be recieving the emails then return to the main menu.
Back on the main menu click on Email templates to create a new template.
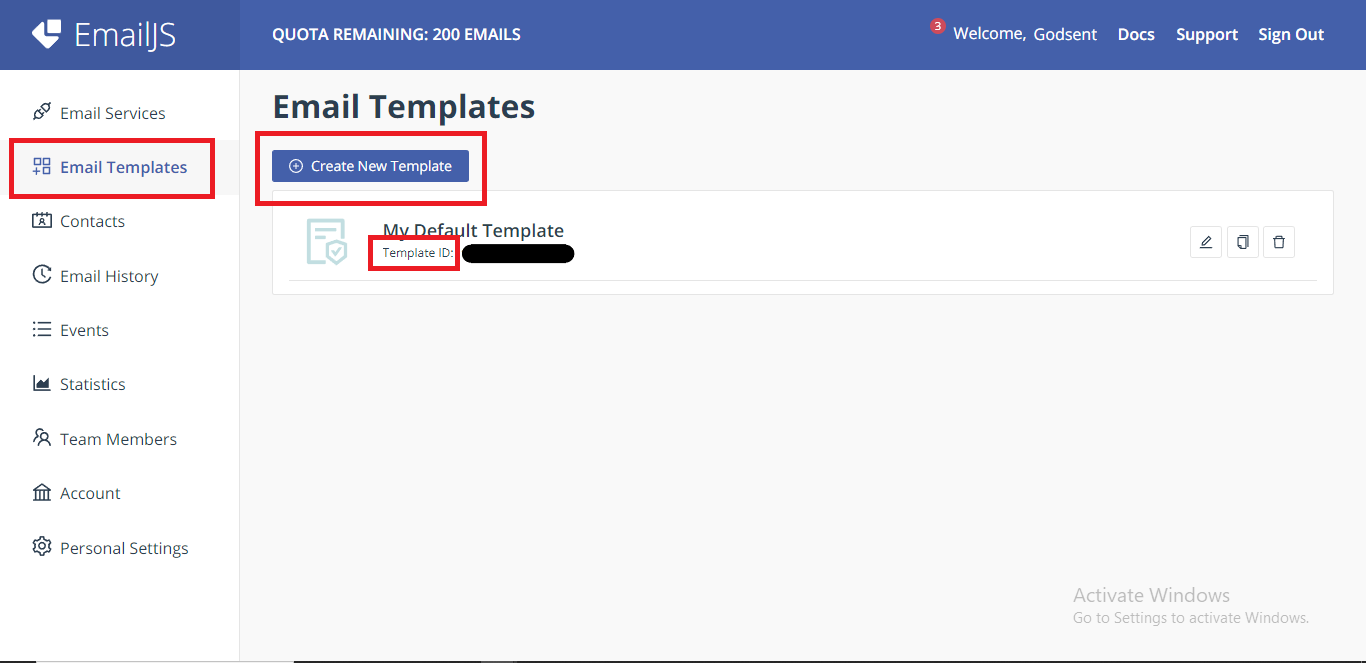
I would show how to create a new template but as you can see in the image above I also have a template created before now, so take note of where the Template ID is located because we would be needing it later. Click on the "create new template" button and you'd see a screen like the one below
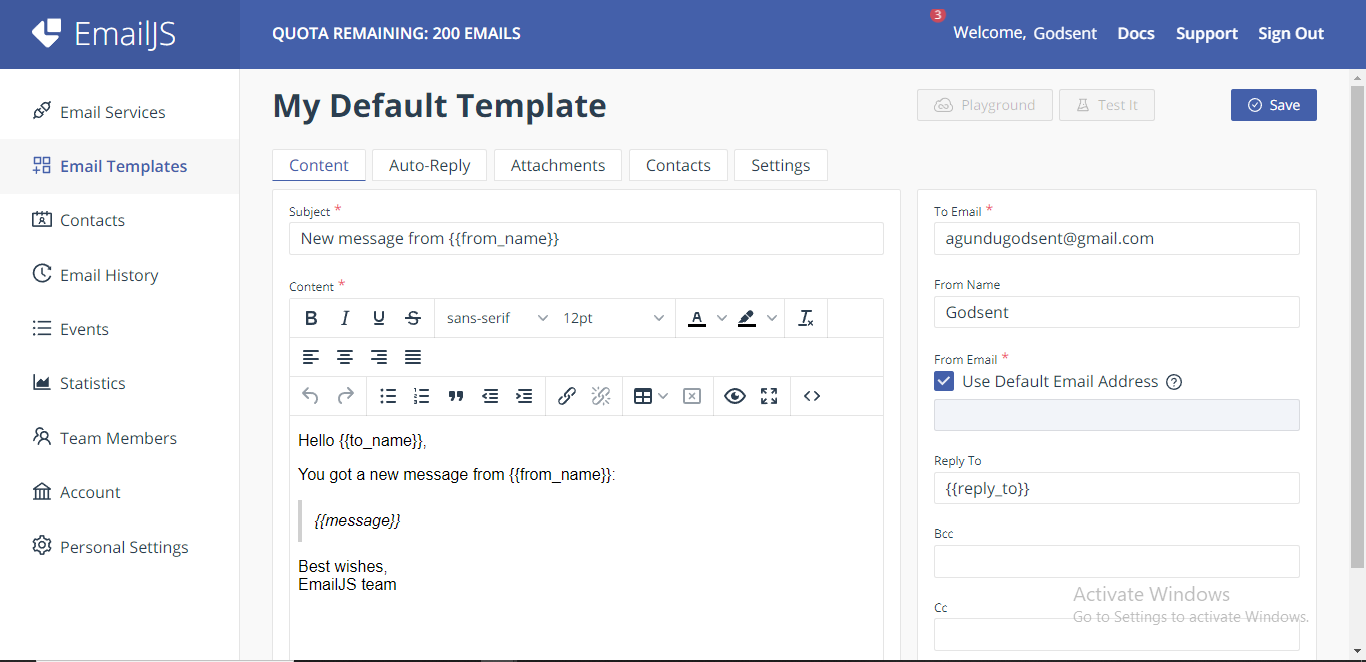
Notice how the screen looks like you're about to compose an email, well you are but to your future self from anyone that fills your form. Take not of the texts inside the curly braces like the {{message}}, those are variables that would hold the data from each form field in your form.
In my template I made use of variables like {{user_name}}, {{user_email}} and {{message}} because on the form on my portfolio anybody wanting to contact me has to send their name, email and message(reason for wanting to reach me).
So my customised template looks like so
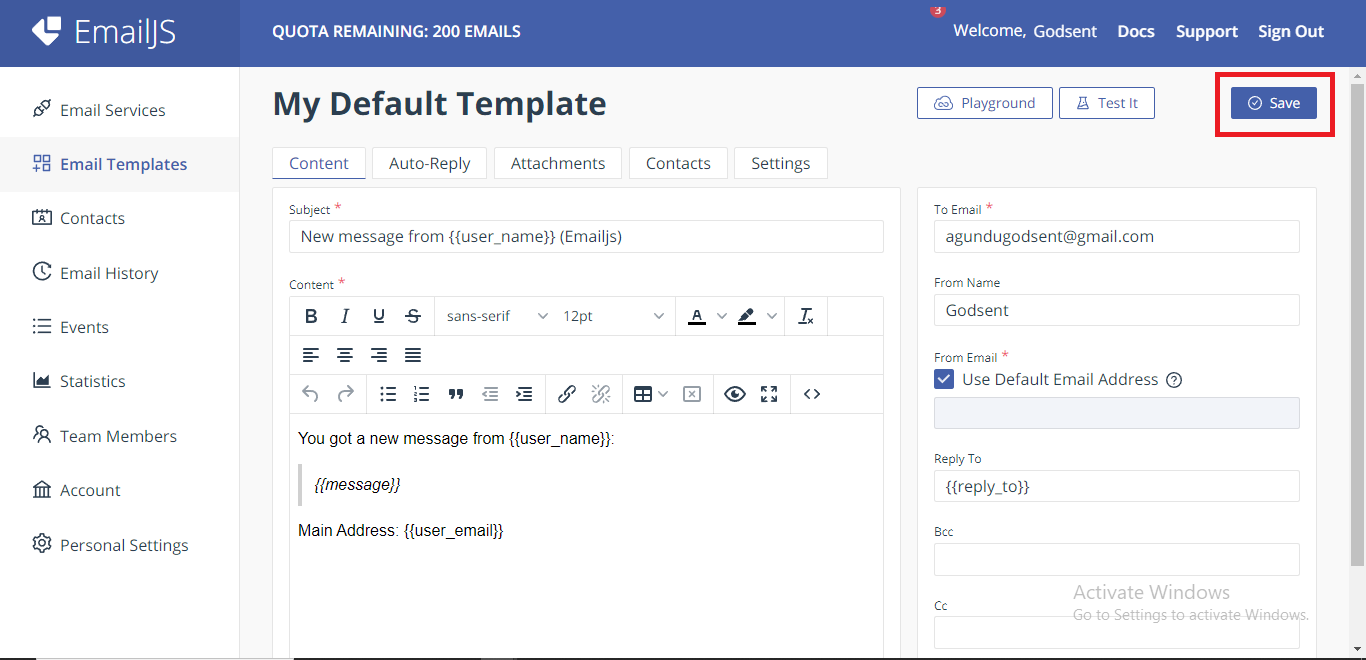
Now save your template and once again do not forget the names of the variables used in your template, also get your Template and Service IDs.
And so we return to code, all that remains now is to create our simple form in our application and setup the function that handles the logic of sending the form data to our email.
So at the top of our component we import the useRef hook from React and Email JS.
import React, { useRef } from 'react';
import emailjs from '@emailjs/browser';

export const ContactUs = () => {
  const form = useRef();

  return (
    <form ref={form} onSubmit={sendEmail}>
      <label>Name</label>
      <input type="text" name="user_name" />
      <label>Email</label>
      <input type="email" name="user_email" />
      <label>Message</label>
      <textarea name="message" />
      <input type="submit" value="Send" />
    </form>
  );
};
Inside the function on line 5 we first create a useRef for the form, then we create our form, and remember the variables used in your template because they would be the names of your form fields.
As you'd remember in my case I made use of user_name, user_email and message as my variables so each of them has a form field to get their respective data. All that remains is the "sendEmail" function that handles sending the form data to our email.
  const sendEmail = (e) => {
    e.preventDefault();

    emailjs.sendForm('YOUR_SERVICE_ID', 'YOUR_TEMPLATE_ID', form.current, 'YOUR_PUBLIC_KEY')
      .then((result) => {
          console.log(result.text);
      }, (error) => {
          console.log(error.text);
      });
  };
So remember we said the Template and Service IDs would be important in the future, well this is the future. In the "sendEmail" function replace the "YOUR_SERVICE_ID" and "YOUR_TEMPLATE_ID" with their actual values from your Email JS dashboard. Finally "YOUR_PUBLIC_KEY" return to your dashboard again
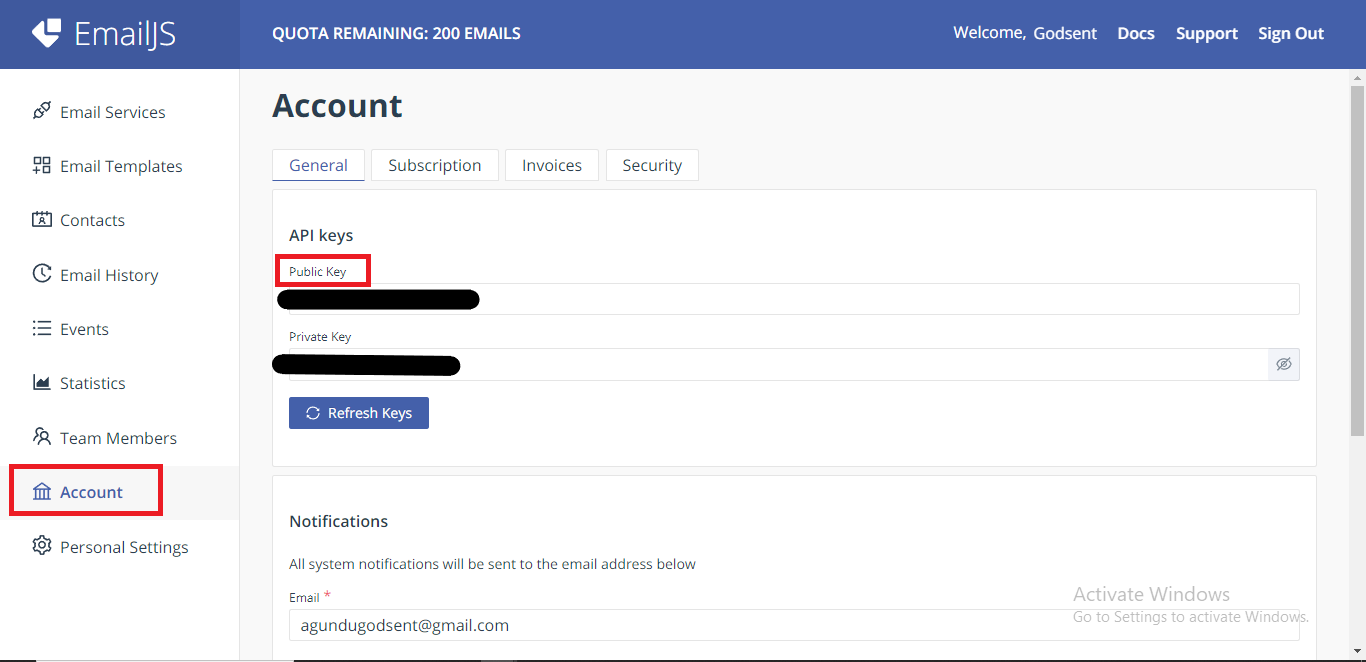
Click on the Account link on the sidebar, their you will find your API keys. Copy the public key and put into your code.
Phew are you still there?? 😂😂
Well if you've managed to stay with me we've come to the end of this tutorial, let's test it out.
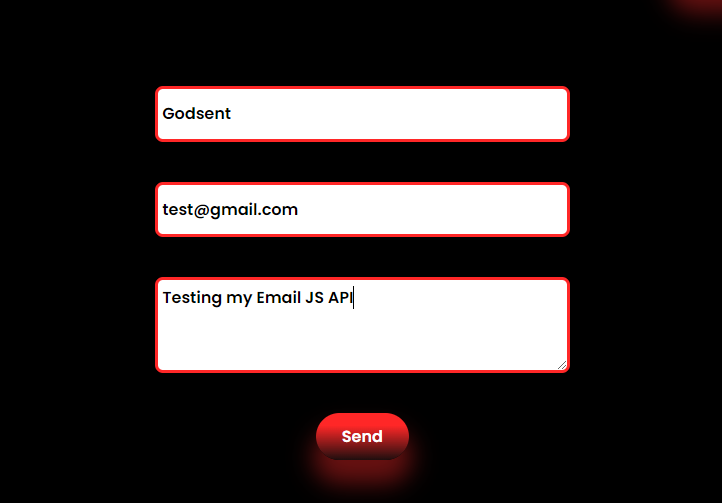
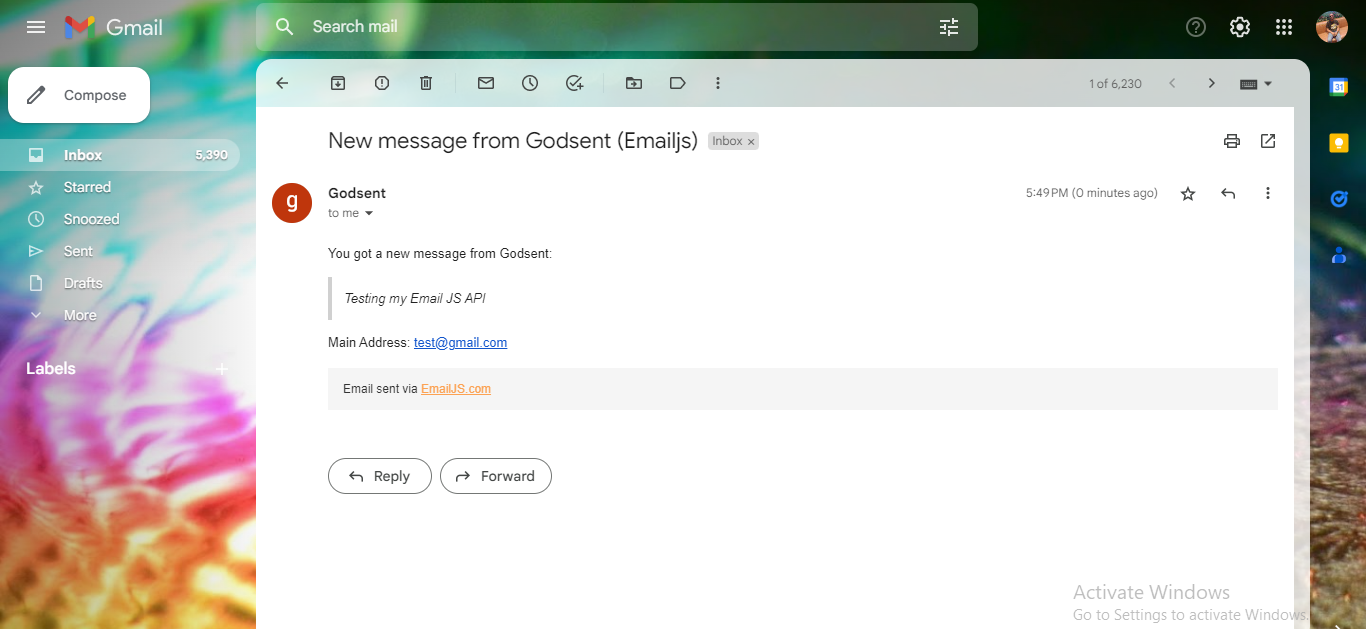
If you followed me all the way I'm sure you'd have successfully sent data from your form directly to your email.
Don't forget to leave a like or even make a comment, let's interact!
